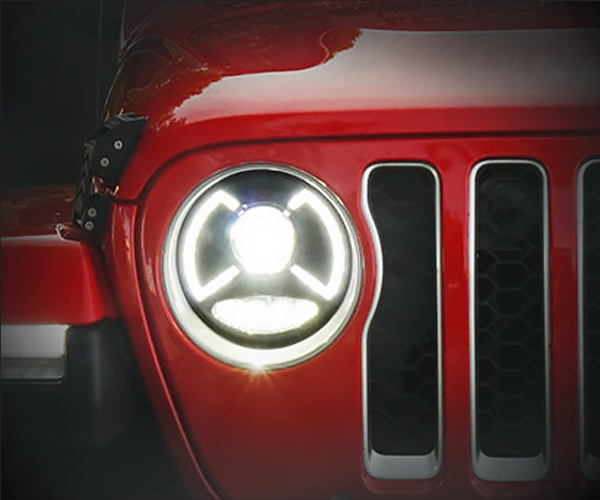
Upgrading your Jeep’s headlights is one of the fastest ways to improve both style and safety. Whether you're switching from halogen to LED or just want something that looks more aggressive, installing aftermarket headlights—like those from Xprite—is a straightforward DIY project.
In this guide, we’ll walk you through the exact steps to replace and install new headlights on your Jeep Wrangler JL or Gladiator JT using basic tools.
Tools You’ll Need
-
Flathead screwdriver
-
T15 Torx driver
-
Ratchet with socket extension
-
10mm socket
-
Zip ties or wire clips (optional)

Step 1: Remove the Front Grille
-
Pop the hood and locate the six plastic clips along the top of the grille.
-
Use a flathead screwdriver to pop each clip upward—be gentle to avoid damaging them.
-
With the clips removed, firmly pull the bottom of the grille outward to release the lower tabs.
-
Set the grille aside in a safe place.
Step 2: Remove Factory Headlights
-
You’ll now see the headlight mounting ring held in place by four screws (usually Torx T15 or 10mm bolts).
-
Unscrew them carefully while holding the headlight to avoid it falling out.
-
Unplug the factory headlight connector and set the old headlight aside.
Step 3: Prepare the New Headlights
If your new headlights come with DRL (Daytime Running Lights) or RGB halos, you’ll need to plan out the wiring:
-
Main headlight connector: Typically plug-and-play with factory harness.
-
DRL wire (usually red or white): Should be connected to an ignition-powered fuse slot.
-
Ground wire (black): Connect to chassis ground or negative battery terminal.
-
Optional RGB controller: Mount the Bluetooth or RF module in a dry area near the firewall.
Step 4: Wire DRL to an Ignition Fuse
-
Open your Jeep’s fuse box (located near the battery).
-
Use an "Add-a-Fuse" tap to connect the DRL wire to a circuit that powers on with the ignition (e.g., F52 for ACC).
-
Route the wire neatly around the engine bay, avoiding hot components and sharp edges.
-
Secure the wire with zip ties.
Step 5: Install New Headlights
-
Plug the new headlight’s main connector into the factory socket.
-
Carefully position the headlight into the housing.
-
Reattach the mounting ring and secure it with all screws.
-
Repeat the process for the other headlight.
Step 6: Reinstall the Grille
-
Align the bottom tabs of the grille with the slots on the bumper.
-
Press the grille firmly into place.
-
Reinstall all six plastic clips across the top.
-
Close the hood.
Step 7: Test Your Headlights
Before you hit the road, make sure everything works:
-
Low and high beams
-
DRL or halo lights
-
Turn signals (if integrated)
-
RGB modes (if applicable)
Pro Tips:
-
Mount your RGB or DRL control module away from direct heat and water exposure.
-
Always disconnect the battery before making electrical connections.
-
Aim your headlights properly to avoid blinding other drivers—some states require alignment checks.
Conclusion
Installing aftermarket Jeep headlights from Xprite is a rewarding project that instantly enhances your vehicle’s function and appearance. With improved visibility, modern styling, and customizable options like halos or RGB, your Jeep is ready to stand out both on and off the road.


Leave a comment
This site is protected by hCaptcha and the hCaptcha Privacy Policy and Terms of Service apply.