With Halloween just around the corner, now’s the perfect time to turn your ride into a mobile piece of festive fun. Whether you’re prepping for a family night out, a “trunk‐or‐treat” event, or simply want to show off your spooky spirit, this blog post will walk you through creative, safe and attention-grabbing ways to decorate your car — and how you can tie in some of XpriteUSA’s amazing lighting and accessory solutions to make it shine.
1. Why decorate your car for Halloween?
It’s a fun way to extend your Halloween theme beyond your house.
Great for “Trunk-or-Treat” or neighborhood drive-by events.
It catches people’s attention — think fun posts for social media (and hey, maybe some extra engagement for XpriteUSA products!).
It lets you show off your personality through your car, and using lighting accessories (like LED strips or accent lights from XpriteUSA) helps you stand out after dark.
2. Safety First: What to watch out for
While decorating is fun, you don’t want to compromise visibility, driving safety, or legality. A recent-warning article reminded drivers that decorations blocking the view or number plate could lead to fines.
Checklist for safety:
-
Ensure windshield, side mirrors and rear view are unobstructed.
-
Avoid decorations that loosely dangle and could fall into the road or distract you.
-
Make sure headlights, brake lights, and turn signals are still visible and working.
-
Keep décor detachable — when you drive normally, remove or adjust heavy decorations.
-
If using lights: make sure they don’t flash wildly in ways that could distract other drivers.
3. Exterior Decoration Ideas
Here are some fun ideas for the outside of your car — many of which pair nicely with lighting accessories or accent kits.
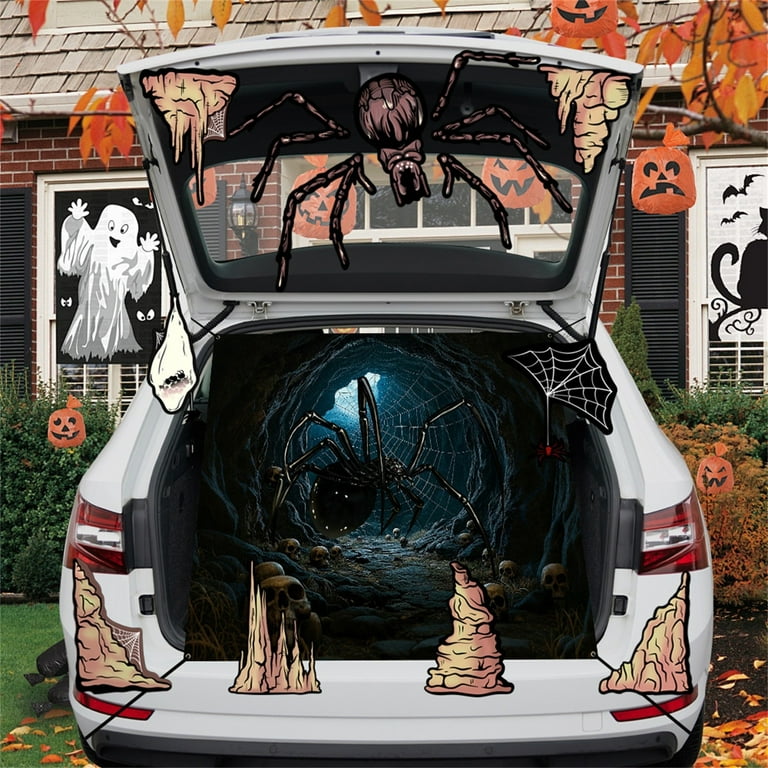
A. Spooky Face / Themed Car Wrap

-
Add large vinyl decals: spider webs, ghost silhouettes, pumpkins. For example, a “witch legs” prop sticking out of your trunk is an instant attention-getter.
-
Use removable magnetic stickers so you can undo after the holiday without damage.
-
For lighting: mount a warm orange LED strip under the front bumper or around the grille to cast an eerie glow.
-
Tip: Pick one main theme (e.g., “haunted trunk”, “giant spider car”) so the effect is cohesive rather than cluttered.
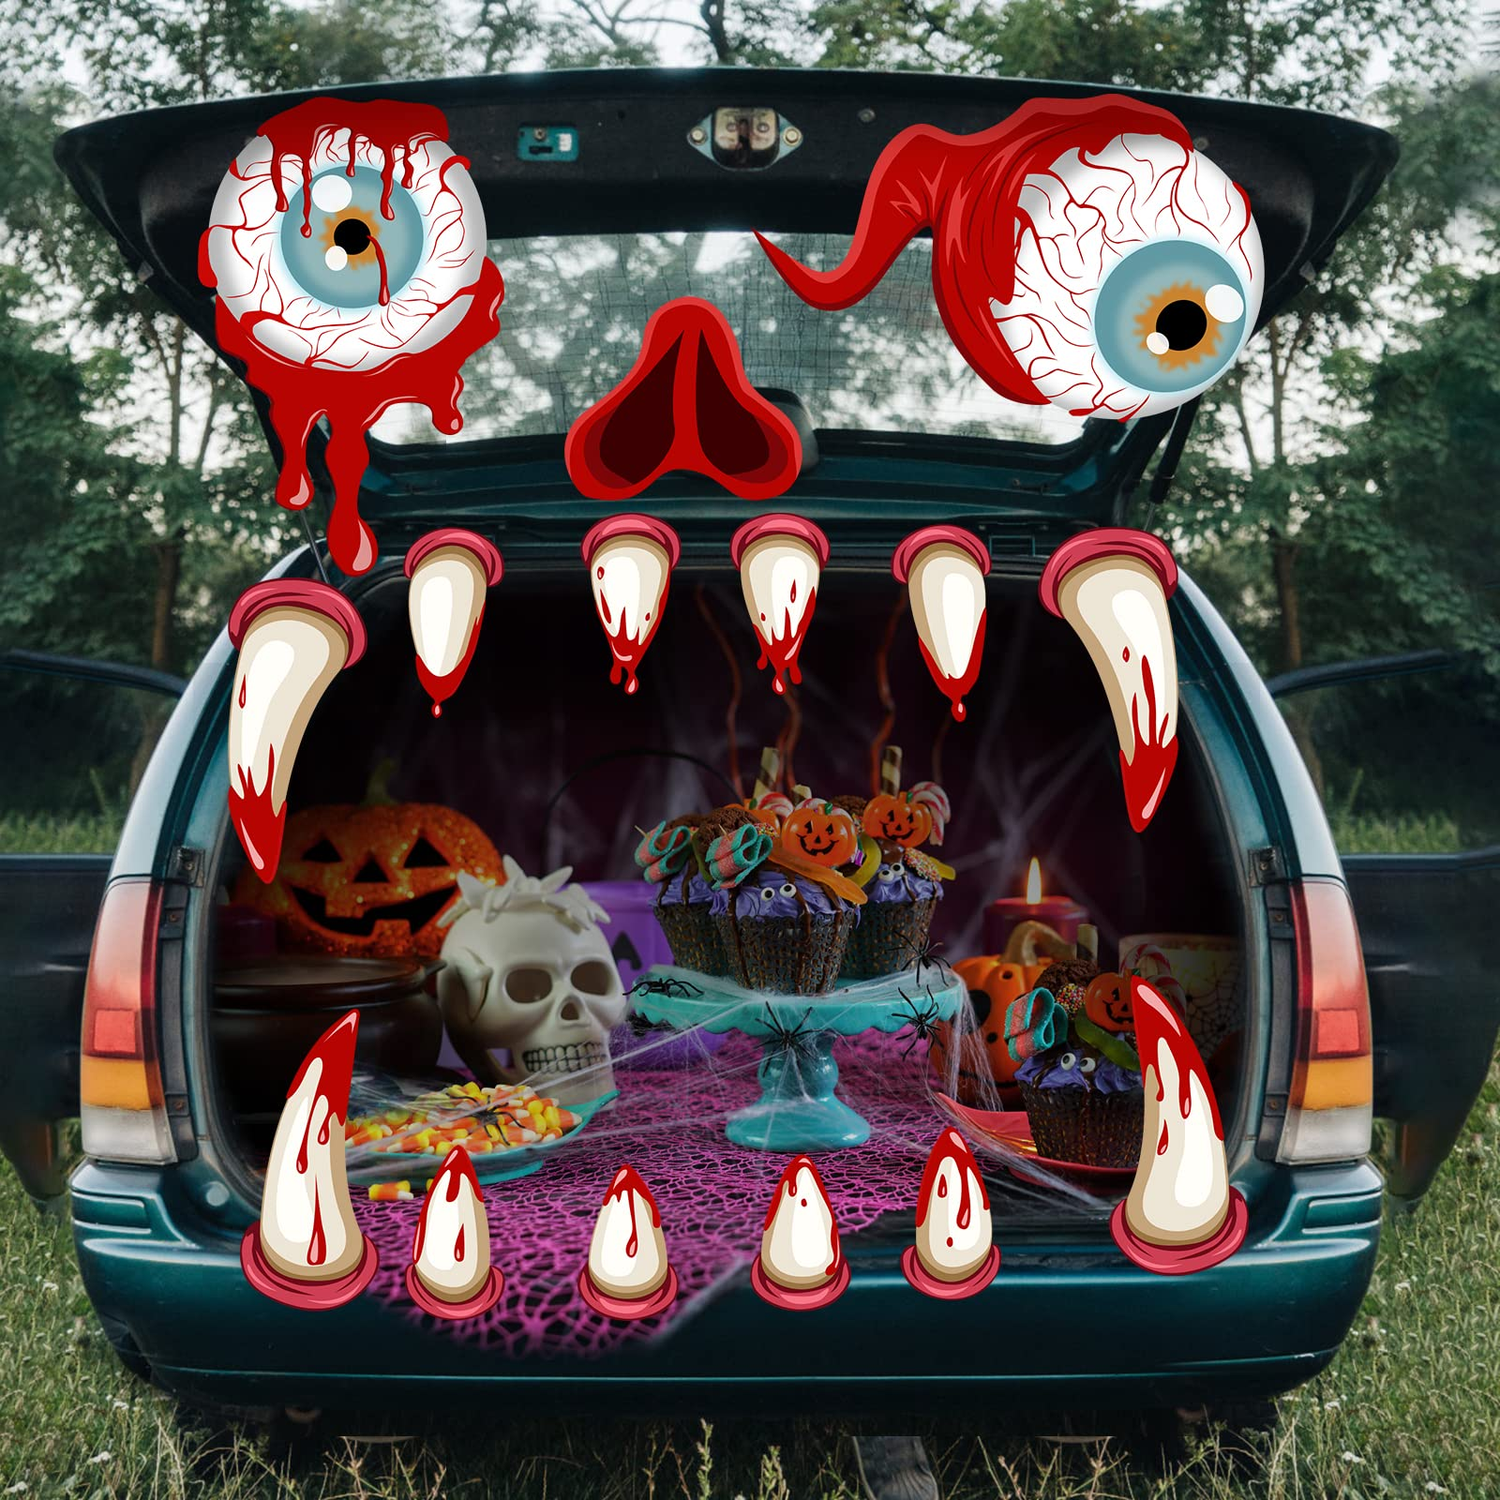
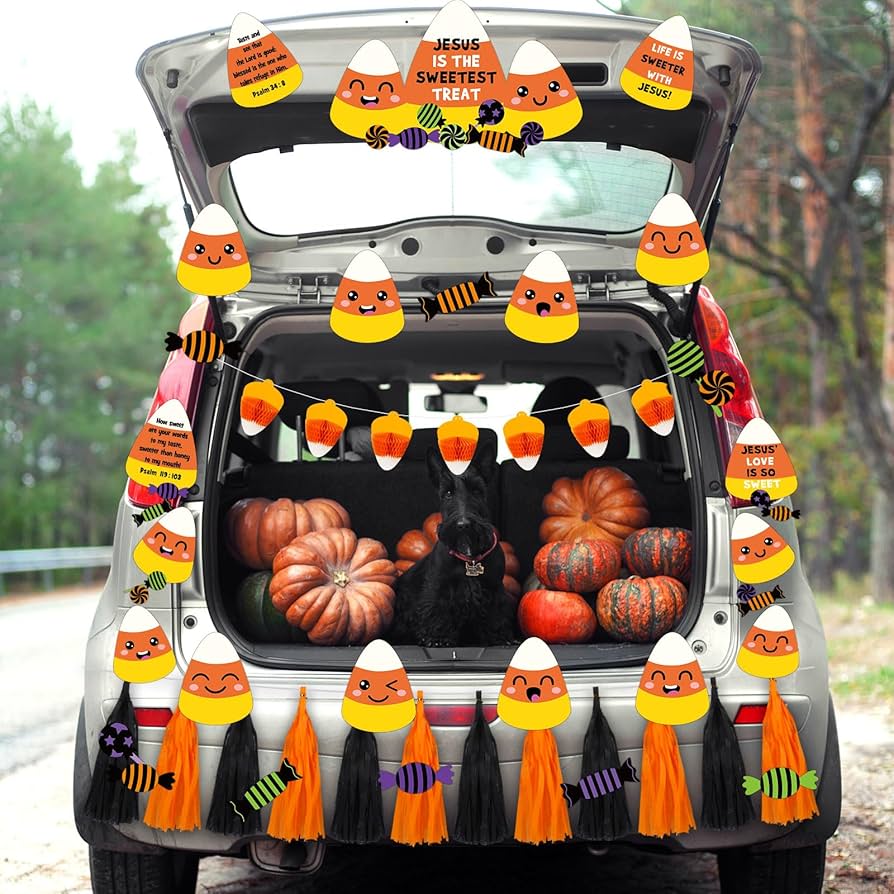
B. Trunk or Treat Setup
-
If you’ll be parked for trick-or-treating: open the trunk and decorate it as a scene (haunted graveyard, monster mouth, etc.).
-
Use battery-powered LED floodlights (XpriteUSA has portable lighting accessories that could be adapted) so the trunk is visible after dark.
-
Add props: fake tombstones, skeletons, faux webbing. Ideas include using crepe paper or paper-plates for creative effect.
-
Safety suggestion: Keep a candy bowl on a stable surface; ensure no sharp objects are hanging that could be hazardous when kids approach.
C. Interior Accent Lighting & Dashboard Décor
-
Use dimmable LED strip lighting (XpriteUSA’s interior lighting kits come in handy) around the foot-well or dashboard to create a spooky ambiance.
-
Place small plush ghosts, skeleton hands reaching from the glove box, or webbing on the headrests.
-
Keep decorations away from foot pedals and driver’s view. Avoid hanging items from the rear view mirror that could be illegal.
-
You could also pair mood lighting with a spooky playlist for the ride.
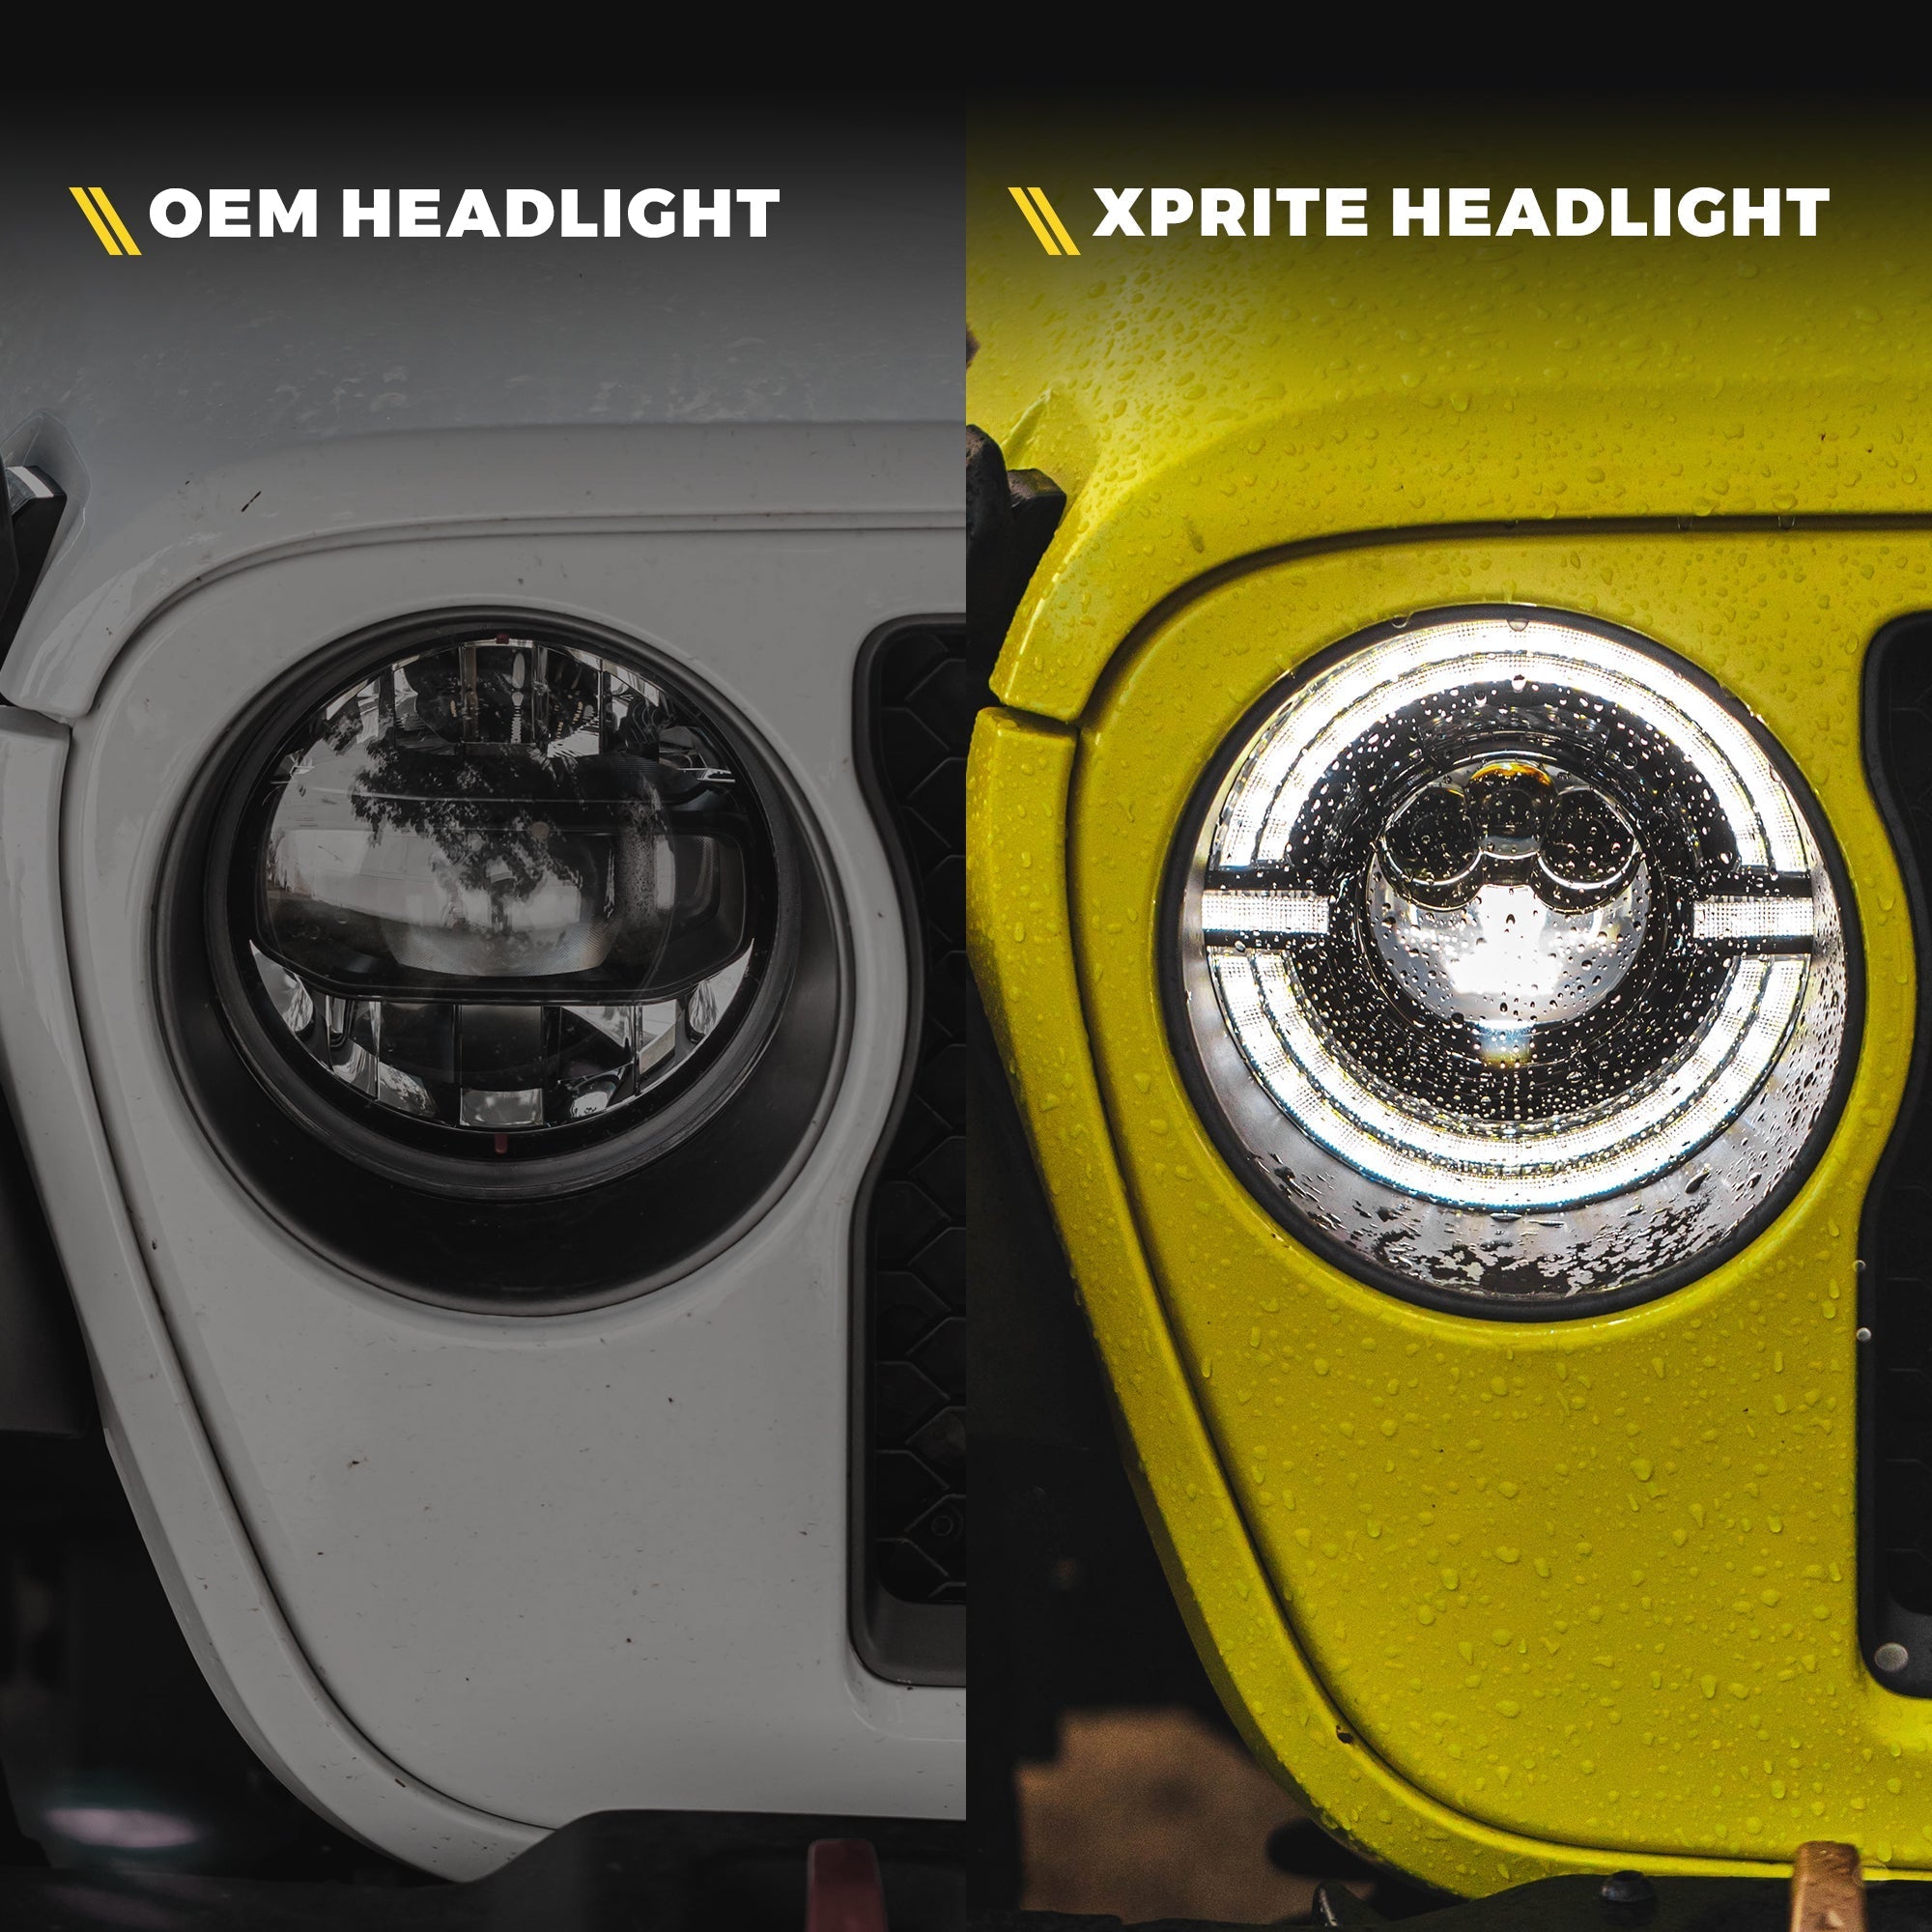
4. Highlighting XpriteUSA’s Lighting & Accessory Options
Since you’re writing this for the XpriteUSA site, you’ll want to integrate product use-cases: how your products can enhance the Halloween car décor.
-
Interior LED Light Kits: Mention how XpriteUSA’s LED strips or ambient foot-well lights can be switched to orange or purple for Halloween theme.
-
Exterior Accent Lights: Show how under-car or grille lighting can provide a glow, highlighting decals or props on your car’s exterior.
-
Snap-On Accessories: If you carry magnetic LED puck lights or battery-powered accent lamps, point out how they allow you to light props (inside the trunk for trunk-or-treat) without wiring through the car permanently.
-
Safe & Removable Décor: Emphasize that all decoration should be temporary — using magnets, clips, or straps rather than adhesives that could damage paint. Pair with your brand’s message of “stylish, safe, and removable”.
5. Step-by-Step Mini Project: “Haunted Trunk on the Go”
Here’s a quick plan you or your customers can follow:
-
Planning (1–2 hours ahead)
-
Choose your theme (e.g., Monster Mouth, Graveyard, Ghost Ship).
-
Gather materials: decals, props, LED kits, extension cords/batteries.
-
Pick up XpriteUSA lighting accessory specific for interior or trunk.
-
-
Decoration Setup (30–45 minutes)
-
Clean the exterior surface where decals/magnets will go.
-
Apply decals/magnets (e.g., spider web on hood, pumpkin face on bumper).
-
Arrange props in trunk: tombstones on vehicle floor, skeleton on seat.
-
Install lighting: position battery-powered LED floodlight or strip near trunk opening for visibility. Wire it safely (or use battery pack).
-
Set interior mood lighting: choose orange/purple LED tone, set to steady or slow fade.
-
-
Final Check (15 minutes)
-
Ensure visibility: headlights, brake lights, turn signals all visible.
-
Ensure no decorations interfere with driving: steering, pedals, mirrors.
-
Test lighting and decorations in the dark to check effect.
-
Secure all props so nothing flies off while driving.
-
-
Enjoy & Share
-
Drive to trick-or-treat event, neighborhood parade or simply showcase for fun.
-
Encourage users to share their car setups with hashtag (e.g., #XpriteSpookyRide) to build community & social proof.
-
After the event, remove all décor promptly and switch the car back to normal.
-

1 comment
Luly Cruz
On 12/23 we ordered a grille for a jeep with turn signal. We have not received confirmation of the order. Can someone assist?
Leave a comment
This site is protected by hCaptcha and the hCaptcha Privacy Policy and Terms of Service apply.