What are Rock Lights?
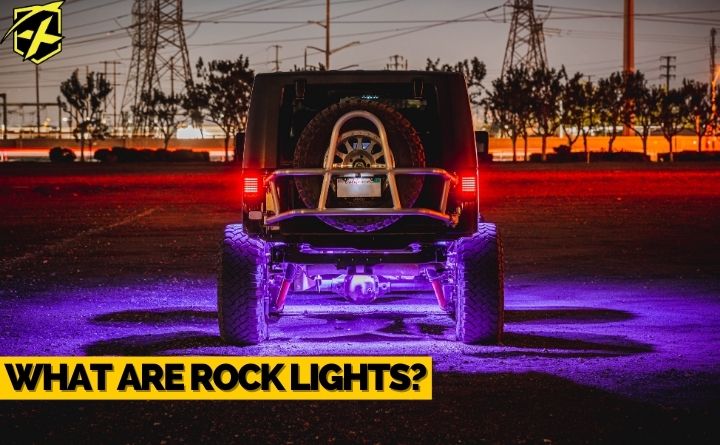
Rock lights are small lights in hard casings that are typically placed beneath a vehicle’s body in order to illuminate the space below. Rock lights come in a variety of different styles. Some rock lights are static single-color bulbs and others come with RGB color-changing LEDs. Some have a single light bulb, others have a grouping of smaller LEDs. Due to the conditions offroaders seek, the lights are often cased in a metal or strong plastic that can resist physical damage, weather problems, and even long-term wear and tear.

Xprite's Jeep rock lights, especially those with RGB functionality, have many different purposes. Not only are they simply to look cool and have light coming from beneath your Jeep, but also they’re great for illuminating the space beneath you. The reason they’re called rock lights is that the reason they were created for when a vehicle was rock climbing at night. You have to be careful when bringing such a large vehicle down rocky terrain and often people will stand nearby and observe the climb in order to shout out directions. Just because night falls doesn’t mean that the journey can or should end. With rock lights, you can safely traverse precarious rock formations.
At Xprite, we offer multiple series including the Trophy series (pictured below), the Discovery series, and the Discovery Plus series.

How to install rock lights
- The first thing you’ll want to do is find the ideal place to put your rock lights. We recommend the flat surfaces underneath your vehicle that you can puncture without issue. If you don’t have a good flat surface and only have curved places the Trophy series lights come with a curved rubber mount that will work to mount it steadily
- The trophy series rock lights have a little rubber base that guides the wire from the center of the light and moves them to the side. It also comes with a hole in the center to put the wire through. In the case of using the center hole, you’d have to drill a hole in the bottom of your vehicle. The wire detaches in the middle so you can feed it through the hole before conducting the final drilling.

- Your screws will have to pierce the frame or you can pre-drill your holes and use a long bolt and nut to secure them. We would recommend that if you have to pierce metal you should pre-drill those holes, however, if it’s plastic, they can be easily pierced, in which case just put use the screws.
- Once you’ve got the piece mounted, repeat those steps for each light, spreading them evenly around the underside of your vehicle.
- Once that’s done you can feed the wire through the body, zip tying each wire to the appropriate space. You can manage your own cables to ensure that you don’t catch the wires in any moving parts or melt them on your tailpipe.

- Filter all of these wired to your power source. You can either connect directly to the battery, to the fuse box, or to an ACC.
- Each vehicle is different, but ultimately the process is the same, hook your wires up to a power source. You can either connect directly to the source or tap into previously established wires.
- Once you’ve got power use either the remote or the Bluetooth phone app to change colors, scroll through the various flashing modes, or connect to music to get the lights to match up to the beat.


Leave a comment
This site is protected by hCaptcha and the hCaptcha Privacy Policy and Terms of Service apply.